How to Grow Garlic in Pots: A Lehsun Guide for Indian Homes
How to Grow Garlic in Pots: A Lehsun Guide for Indian Homes
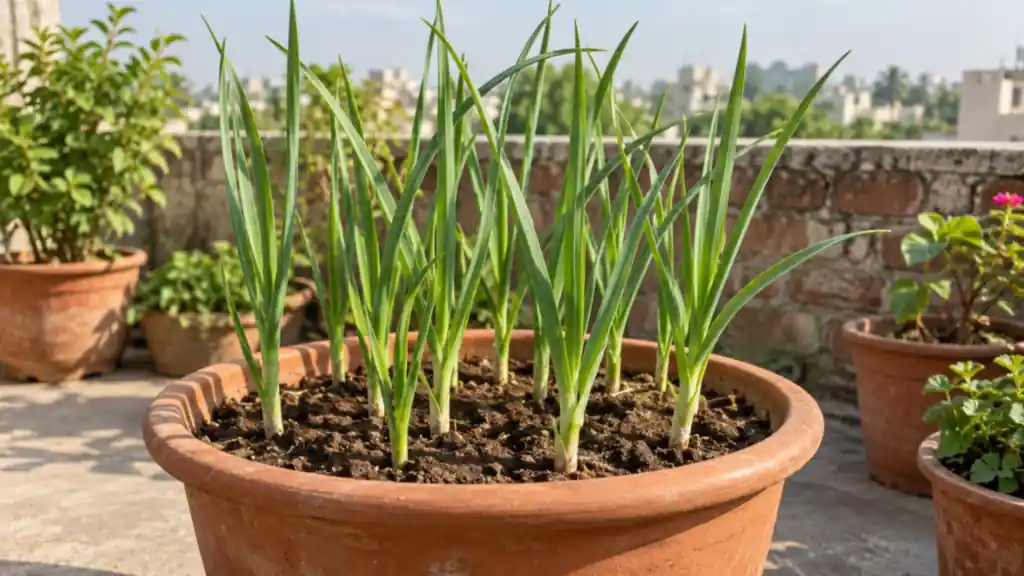
Fresh garlic from your own terrace has a sharper smell and juicier cloves than the dry bulbs that sit for weeks at a shop. The good news is that you do not need a farm to grow it. This guide explains how to grow garlic in pots on a balcony or terrace in India, from choosing cloves in October to curing your own bulbs in spring. Garlic is slow, but it is also one of the easiest crops to leave alone once it is planted.
Garlic Planting Season in India
The main garlic planting season in India is from October to November in the plains, when nights start to cool. Garlic needs cool weather while leaves and roots develop, and warmer, longer days later for the bulbs to swell. In the hills, gardeners often plant earlier, in September or October. If you are in Gujarat, Maharashtra, Madhya Pradesh or the northern plains, late October and November are a good window.
Read more: Explore Gardenica Rock Phosphate
Planting too late, after mid-December, usually gives smaller bulbs because the plant has less cool weather to grow leaves before summer arrives. If you are planning the rest of your winter pots, our guide to vegetables to grow in October in India pairs well with garlic.
What You Need Before Planting
Choosing the Right Pot
Garlic roots go deeper than many people expect. Pick a pot or grow bag at least 20 to 25 cm (8 to 10 inches) deep with good drainage holes. A wide, shallow-looking pot or a rectangular trough lets you plant more cloves. Terracotta, plastic and fabric grow bags all work, as long as excess water can escape.
Selecting Garlic Cloves
Use large, firm, healthy bulbs. Bigger cloves generally give bigger bulbs. Garlic from a local vegetable market can sprout, but choose bulbs that are fresh and free of soft spots or mould. Separate the cloves only on planting day and keep the papery skin on each clove.
Preparing the Potting Mix
Garlic likes loose, well-drained soil rich in organic matter. A simple mix is equal parts garden soil, compost and coco peat or sand. Add well-rotted vermicompost for slow nutrition. If you need a refresher, read our guide to potting mix for kitchen gardens. Some gardeners also mix a little rock phosphate into the soil before planting, since phosphorus supports root development. Follow the product label for the amount.
How to Plant Garlic Cloves Step by Step
Once your pot and soil are ready, planting takes only a few minutes.
- Fill the pot with moist potting mix up to about 3 cm below the rim.
- Break the bulb into individual cloves and pick the largest ones.
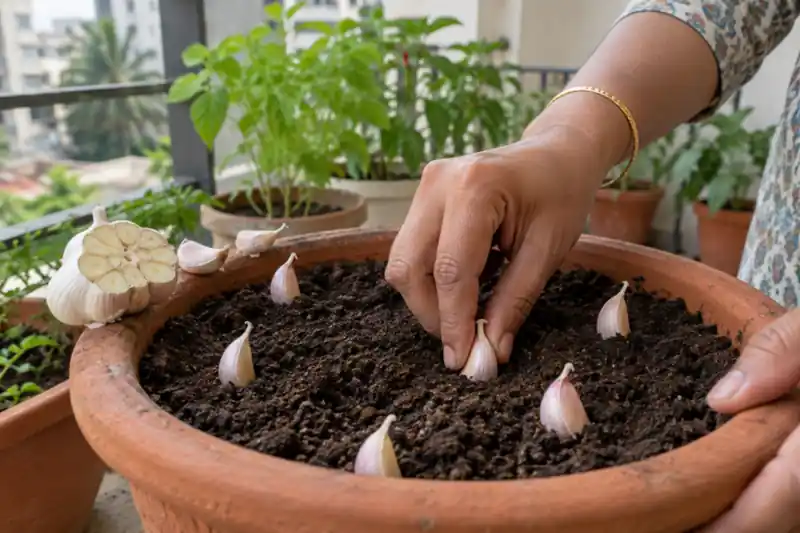
- Push each clove into the soil with the pointed end facing up and the flat root end down.
- Plant about 3 to 5 cm (1 to 2 inches) deep, so the tip is just covered.
- Space cloves about 10 to 15 cm (4 to 6 inches) apart in every direction.
- Water gently until the soil is evenly moist, then place the pot in full sun.
Green shoots usually appear within one to three weeks, depending on temperature and the quality of the cloves.
Garlic Plant Care Through Winter
Sunlight
Garlic needs full sun, ideally six hours or more of direct light each day. Plants in shade make thin leaves and small bulbs. On a balcony, place the pots at the brightest edge and turn them every week or two.
Watering
Keep the soil lightly moist but never soggy. Water when the top 2 to 3 cm of soil feels dry. In cool winter weather, that may mean watering only every few days. Our guide to watering kitchen garden plants explains the finger test in more detail.
Feeding
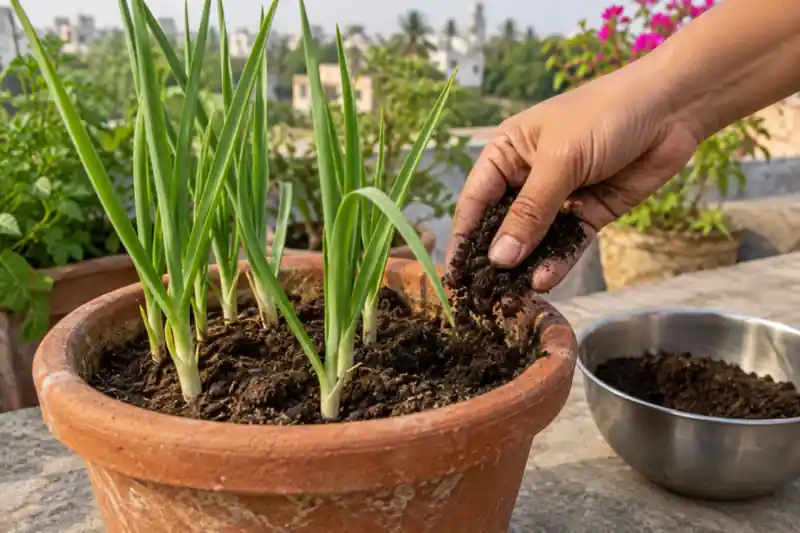
Garlic is a light to moderate feeder. Top-dress the pot with a thin layer of vermicompost about a month after sprouting, and again a month later. A balanced organic plant food can help during active leaf growth. Always follow the dose on the product label, and stop extra feeding once bulbs begin to swell in late winter, as too much nitrogen late in the season can delay bulb formation.
Have a question about this topic?
Chat on WhatsAppCommon Pests and Problems
Garlic in pots is usually healthy, but a few issues can appear, especially in damp or crowded conditions.
- Thrips: Tiny insects that leave silvery streaks on leaves. Check the leaf bases and spray neem oil solution early if you see them.
- Bulb or root rot: Caused mostly by overwatering and poor drainage. Yellowing, limp plants with a soft base are the warning sign.
- Leaf spots and fungal patches: More common after cloudy, humid spells. Remove affected leaves and improve air flow.
- Soil-borne pests: Mixing neem cake into the soil at planting is a traditional preventive step. Our post on neem cake powder for plants explains how to use it.
Common Mistakes When Growing Garlic at Home
Most failed garlic pots come down to a handful of avoidable errors.
- Planting cloves upside down, which wastes energy as the shoot turns around.
- Using a pot that is too shallow, which restricts roots and bulb size.
- Planting too late in the season, after the cool weather window has shortened.
- Overwatering in winter, which invites rot.
- Cutting all the green leaves for cooking. The plant needs most of its leaves to feed the bulb, so snip only a few at a time.
- Harvesting too early, before the outer skins have formed.
When to Harvest Garlic and How to Cure It
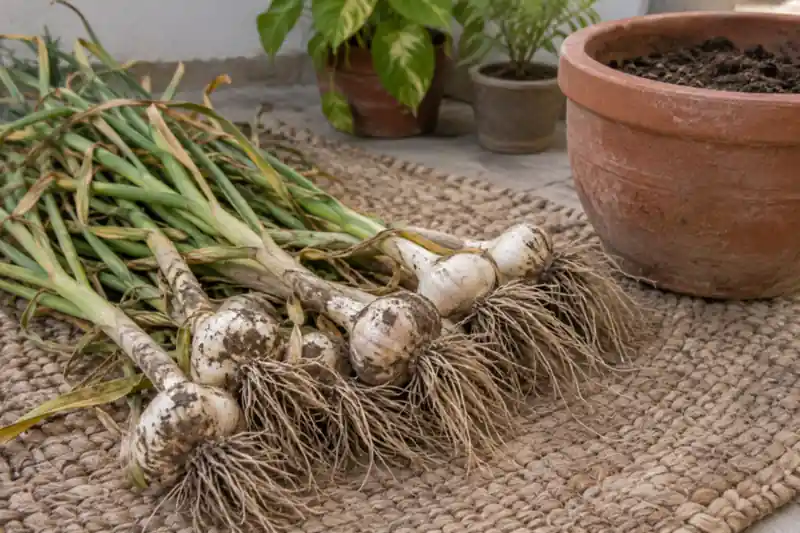
Garlic planted in October or November is usually ready four to five months later, often between February and April depending on your region and variety. The best sign is the leaves: when the lower third to half of the leaves turn yellow and dry while the top few are still green, the bulbs are close to ready.
- Stop watering about one to two weeks before you plan to harvest.
- Loosen the soil around the plant and lift the bulb gently. Do not pull hard on the leaves.
- Brush off loose soil but do not wash the bulbs.
- Cure the whole plants in a dry, shaded, airy place for about two to three weeks.
- Once the skins are papery and the necks are dry, trim the roots and leaves and store the bulbs in a cool, dry spot.
Keep a few of your best bulbs aside to plant again next season.
Frequently Asked Questions
Can I grow garlic from kitchen garlic?
Yes, many home gardeners do. Choose fresh, firm bulbs with large cloves. Results can vary because you do not know the variety, but healthy market garlic often sprouts well.
How many garlic cloves can I plant in one pot?
Keep 10 to 15 cm between cloves. A round pot about 30 cm wide holds roughly five to seven cloves, while a long trough holds more.
How long does garlic take to grow in a pot?
Expect about four to five months from planting to harvest. Garlic greens can be snipped lightly after about a month.
Can I grow garlic indoors?
Garlic needs strong sunlight, so bulbs rarely form well indoors. A sunny window can work for growing garlic greens only.
Why are my garlic leaves turning yellow early?
Early yellowing usually points to overwatering, poor drainage or low nutrition. Yellowing near the end of the season is natural and signals harvest time.
Is garlic a good companion plant?
Many gardeners grow garlic near roses, tomatoes and leafy greens, as its smell is believed to discourage some pests. Treat it as a helpful habit rather than a guaranteed pest control.
Start Your Garlic Pots This Season
Plant a few pots this October or November and you could have home-grown lehsun by spring. For a strong start, mix Gardenica Rock Phosphate into your potting mix as per the label, and feed with organic compost through the season. Have a question about your garlic pots? Contact the Gardenica team and we will be glad to help.
Looking for more?
Continue to our main page to explore products and services.